TABLE OF CONTENTS
- Matching on student code (recommended)
- Matching on student name
- Report type (file type) and Year (eg. 2019 Naplan)
- Separators and filename patterns
- Adding the files to a Zip archive
- Renaming existing files
- Related files
The following information may be of assistance when preparing files and reports for uploading in to SEQTA using the Bulk Import tool.
The following can be used to categorise and match the files or reports with the correct students. These are outlined in detail below.
Matching on student code (recommended)
Ultimately, the best method for the system to match the files to individual students is via the student code. As such, if at all possible include the the student code in the filename. This must be the code as found in Administration workspace>Data management>Students. If this is done, there is no need to match using student First name and Surname; those columns can be left as [ignored] during the import process.
Matching on student name
If it is not an option to include the student code in the filename the files will need to be matched using the student First name and Surname. This requires the manual renaming of any files for students with the same name, to be renamed to include student code and imported in a separate batch.
Report type and Year (eg. 2019 Semester 2 Music)
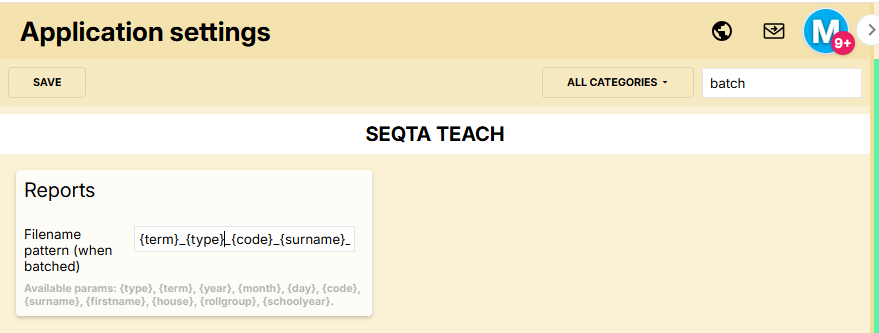
To assist with identifying what the files are once they have been uploaded, we recommend that the file name be set to include the year, type or other useful information, for example 2019_Semester 2_Music report_ BAKERA.pdf.
Separators and filename patterns
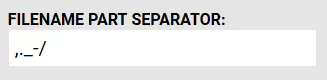
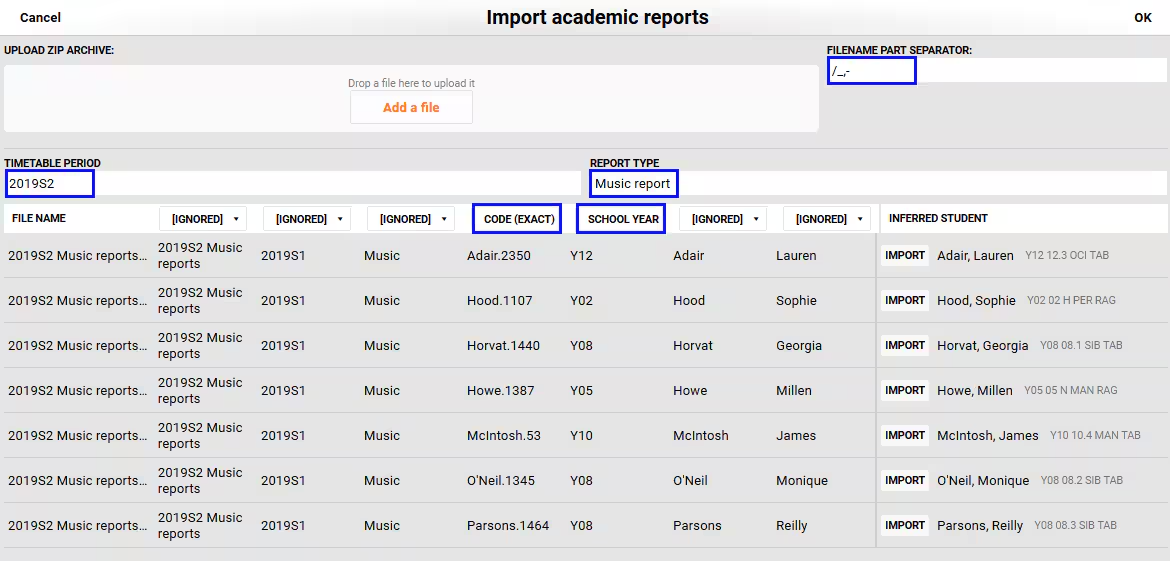
The Bulk import tool... can use any character to separate the data into multiple columns. Some examples are a comma, full-stop, under-score, forward slash or hyphen. These can be selected during the upload process to achieve the required column separations.
If a separator is included in the student code (eg. BAKER_A), it will need to be removed from the list in the Filename part separator box. In addition, the separator (in this example the underscore '_') can not be used for separating the other fields (eg. 2019_Semester 2_Music).
Adding the files to a Zip archive
Once the files have been correctly named they can be added into a ZIP file. If you want to add a label to the file when viewed in the SIP, this can be done by placing the files in a folder, renaming the folder to what you would like to display (eg. 2019S1 Music reports), then ZIPping the entire folder.
Renaming existing files
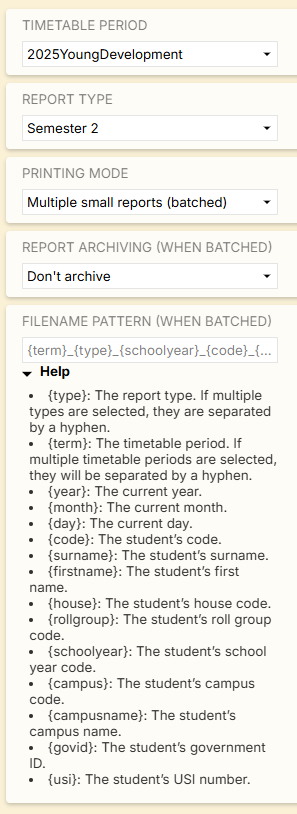
You can print a set of reports ready to be bulk uploaded as a batch by using the Printing mode and Report archiving settings shown in the screenshot below. This is necessary if you have a report for say, Music, that uses the same report settings as the academic report. The music report cannot be archived directly as it will overwrite the academic report, so it needs the be run as a batch (without archiving) and then added to the student record using the Bulk import process.
If your reports have been created by a separate process (eg: BRLA/REA, OLNA, etc), and they do not include your school's student code, then please try to access the files so that they contain both first and last name in the filename.
There are some special applications that can be used to automate the renaming of the files. A web search such as file renaming software will give you a number of options, such as PowerRename, Bulk Rename Utility, Advanced Renamer, A Better Finder Rename. (NOTE: these applications have not been tested by SEQTA; they are offered here as suggestions for your own testing). These applications will take some time to set up, but might save time over the course of a student's enrolment at your school.
Related articles:
Was this article helpful?
That’s Great!
Thank you for your feedback
Sorry! We couldn't be helpful
Thank you for your feedback
Feedback sent
We appreciate your effort and will try to fix the article