TABLE OF CONTENTS
- Restricting Pastoral Care Notes
- Creating Notes Using a 'Restricted Use' Pastoral Care Type
- Assigning a Pastoral Care Note to a Permission Group
- Adding Custom Groups to the 'Restricted To' Drop-Down
There are various components for handling Restricted Pastoral Care Notes which work independent of each other.
Restricting Pastoral Care Notes
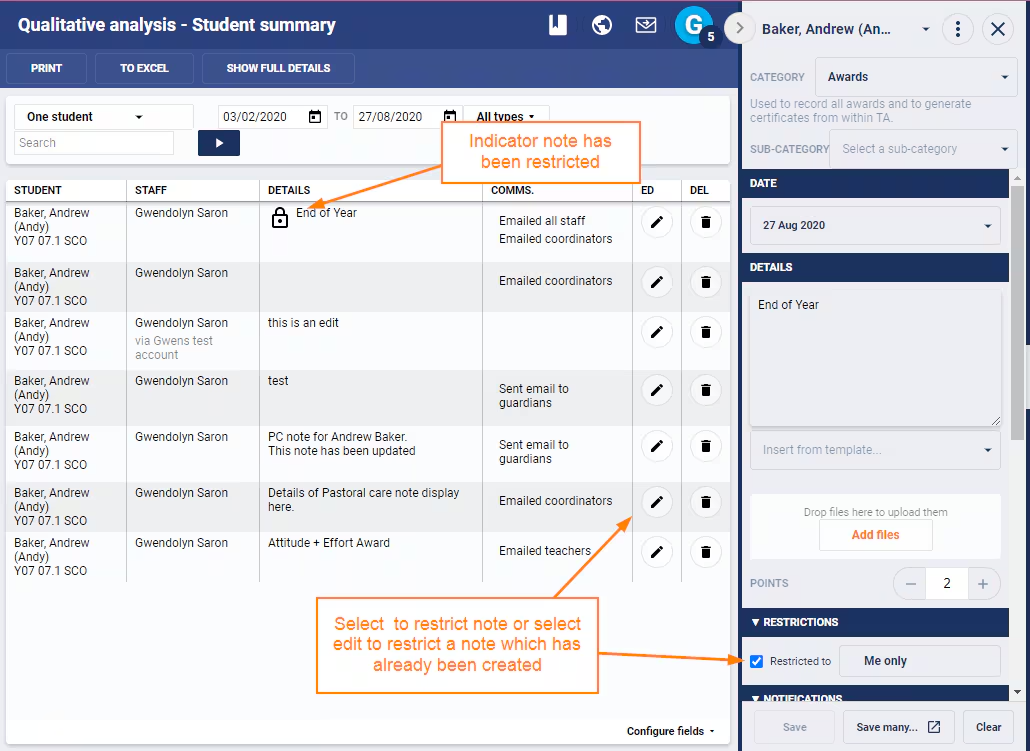
The option to restrict Pastoral care notes when creating and editing them is available to staff with the Permission 'PC: ENTER RES'.
Image below: 'Restricted To' option and indicator for creating a Restricted Pastoral Care Note.
Creating Notes Using a 'Restricted Use' Pastoral Care Type
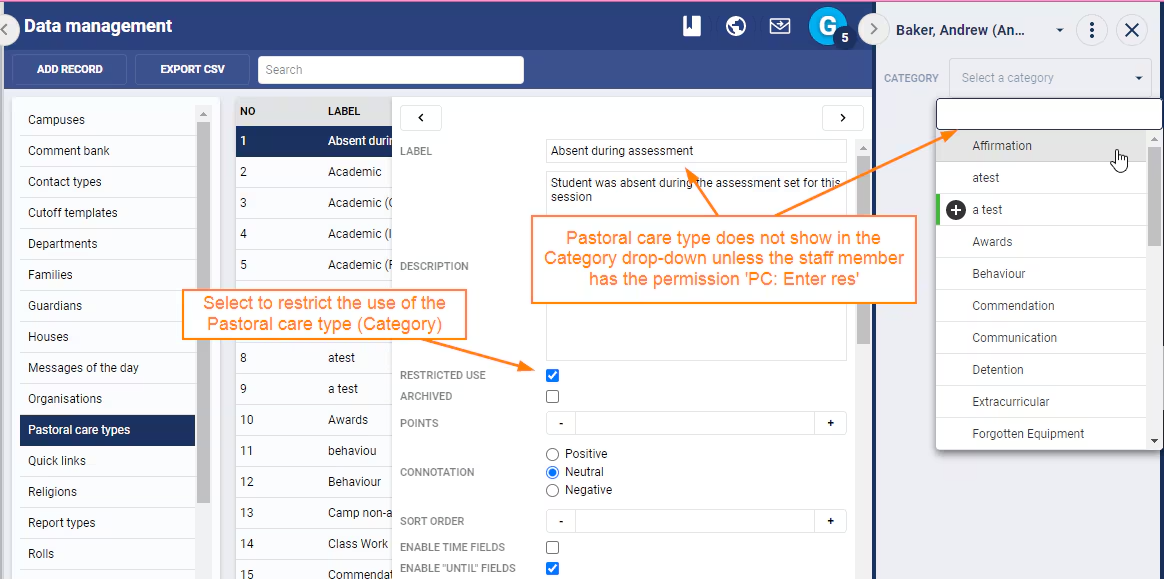
Pastoral Care Types (Categories) can be set as 'Restricted Use', this ensures the Category is only available for selection to staff with the Permission 'PC: ENTER RES'.
Setting a Pastoral Care Type for Restricted Use:
- Go to the Administration Workspace > Data Management > Pastoral Care Types.
- Select the Pastoral Care Type.
- Tick Restricted Use.
- Click SAVE.
- Refresh/Reload the page to pick up the changes.
Assigning a Pastoral Care Note to a Permission Group
When creating and editing a Pastoral Care Note the option to 'Restrict' a Note to is available with specific 'Permission Groups' available.
Restricting and Sending Notification When Creating Pastoral Care Notes
- Select the applicable 'Permission Group' from the drop-down under 'Restricted To'.
- If wanting to send a Notification to those in the Permission Group select 'Message/Email Staff' to whom record is restricted.
Restricting an Existing Pastoral Care Note
- Go to the Administration Workspace > Student Summary > In Detail.
- Select the student and search for the applicable Note.
- Click on the 'Edit' icon. If this cannot be seen click on the 'Configure Fields Button' in the bottom-right corner and tick 'Edit'.
Adding Custom Groups to the 'Restricted To' Drop-Down
Permission Groups with the setting 'CAN BE RES' are displayed under the 'Restricted To' drop-down when creating and editing Pastoral Care Notes.
Permission Groups are populated by the selection of specific staff members, they cannot be linked in anyway to the student selecting when creating notes. This is only available using coordinators, see the article,Managing coordinator notifications (PC notes etc.) for more information.
- Go to the Administration Workspace > Permissions Management.
- Select an existing 'Permission Group'. Alternately, create a new one by clicking on 'Manage Groups', to do this give the Group a Name, add the Staff and click 'SAVE'.
- Select the permission 'CAN BE RES' for groups that need to be available under the 'Restricted To' drop-down.
- Click 'SAVE'.
- Refresh/Reload after assigning and saving the Permission and the Group should then display under 'Restricted Use'.
Was this article helpful?
That’s Great!
Thank you for your feedback
Sorry! We couldn't be helpful
Thank you for your feedback
Feedback sent
We appreciate your effort and will try to fix the article