TABLE OF CONTENTS
Events and Appointments are managed through the teacher's timetable under Calendar. For information about Permissions, see Enabling and Configuring Appointments and Events
Appointments allow invitees to accept or decline the invite, whereas Events do not.
Creating an Appointment or Event
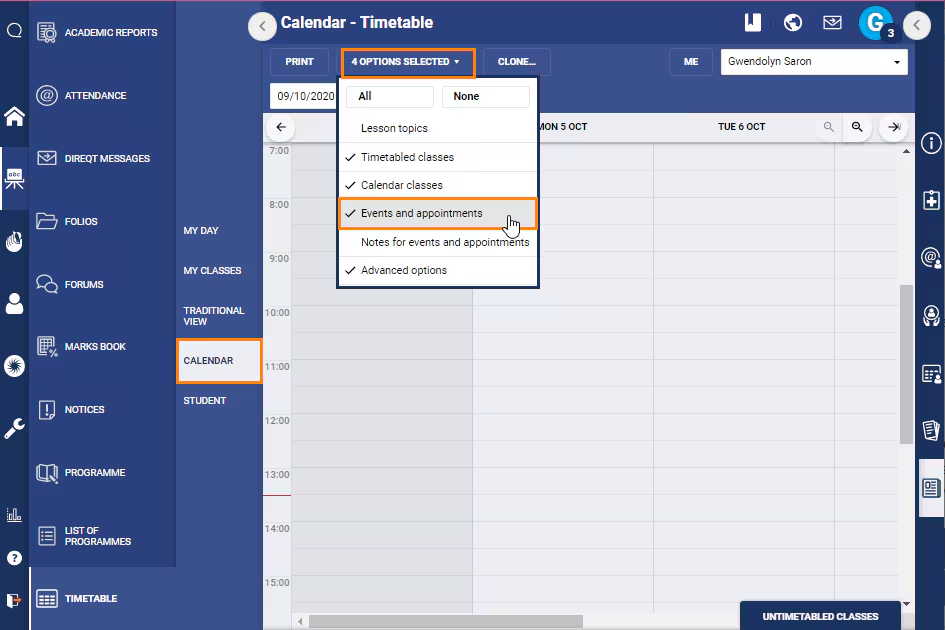
- Go to the Teaching workspace>Timetable>Calendar.
- Ensure that Events and Appointments is selected in the options drop-down in the top-left corner.
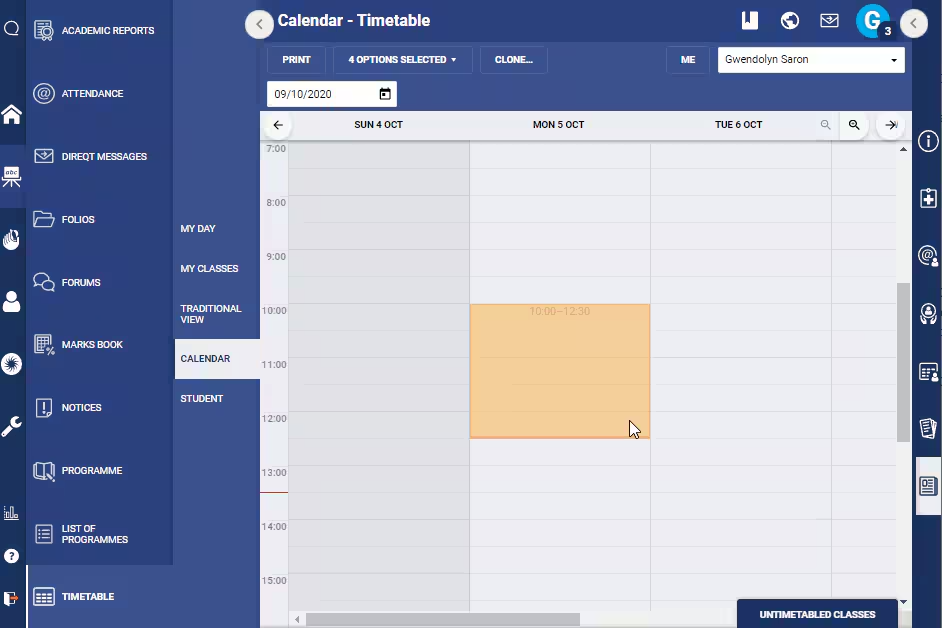
- Click-and-drag on the timetable for the the day/time you would like to add the appointment or event. This can be edited afterward if needed.
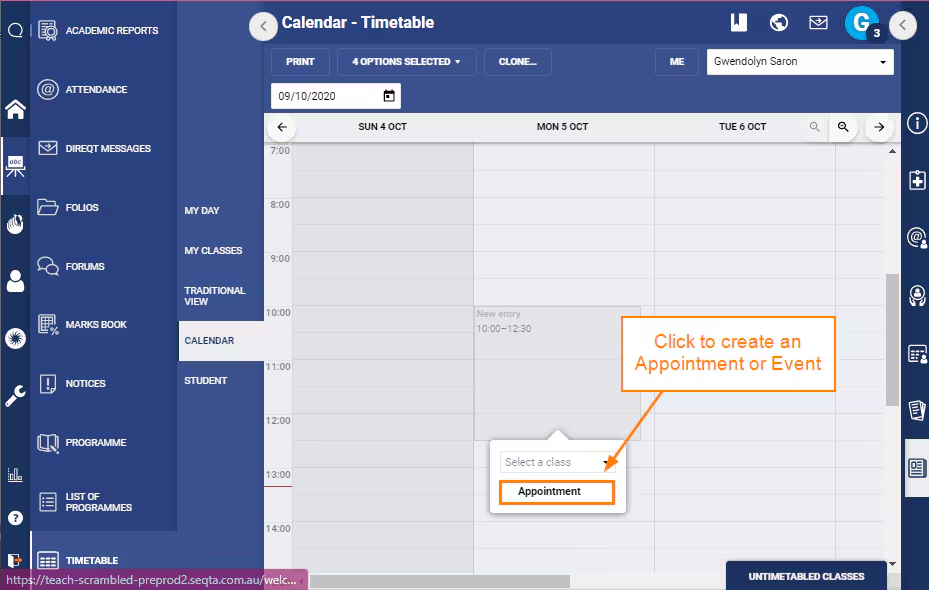
- Select Appointment to create an Appointment or an Event. You will choose which one in step 7.
- Enter a Title.
- Review the date and times - edit if necessary.
- Select Appointment or Event.
- (Optional) Add Invitees, using the selectors on the left-hand side.
- The limit for Events can be set under the Administration Workspace>Application Settings by searching for Events and then typing in the number before clicking SAVE.
- For Appointments there is a hard limit of 30 invitees which cannot be changed.
- (Optional) Select a Room and Organiser.
- Enter the details of the event or appointment.
- Set as Private to restrict the visibility to invitees/attendees and admins.
- Click Save. The event should now be displayed on your calendar and on the calendar of the invitees.
Cloning Appointments or Events
NOTE: The advanced options Bridge section in the Clone classes/events dialogue box is not applicable to appointments or events and will be greyed out.
- Go to the Teaching Workspace>Timetable>Calendar.
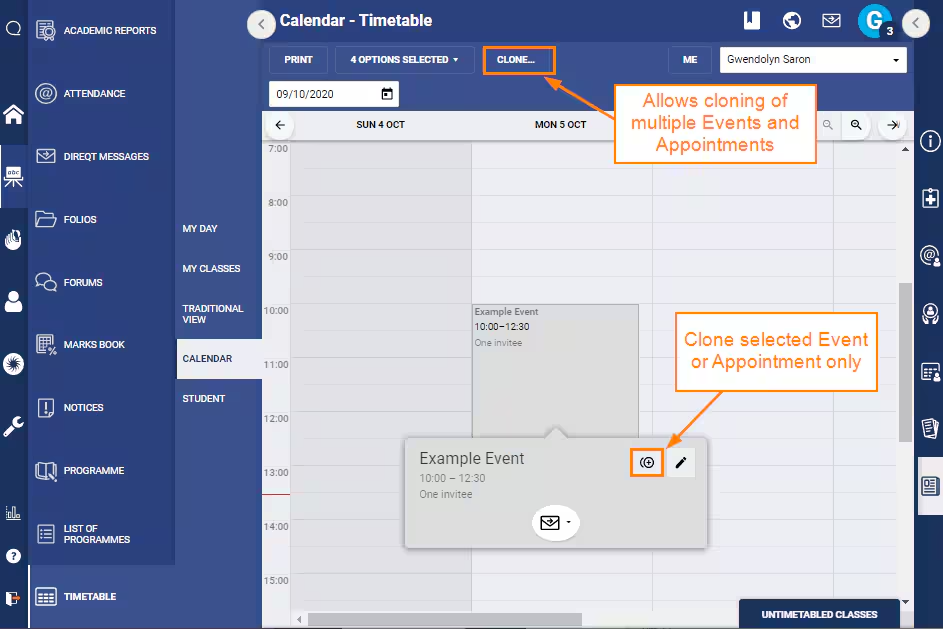
- Click on the Appointment/Event then click on the
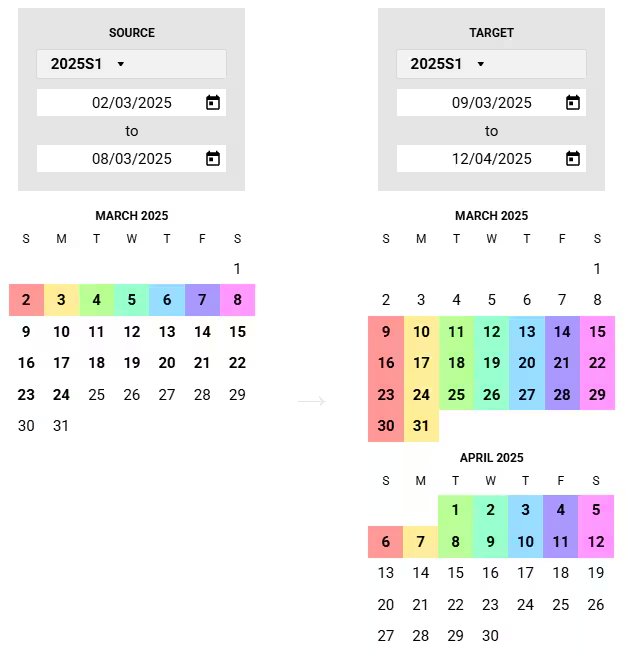
 icon or click on the Clone... button at the top of the work area. Note the different behaviour of the two methods, as shown in the screenshot.
 - Select the Source and Target range. For best results where a weekly repeat is required, choose a 7 day (Sun to Sat) source range, then specify the target using multiple weeks starting on Sunday and finishing on Saturday.
- Click Save.
Was this article helpful?
That’s Great!
Thank you for your feedback
Sorry! We couldn't be helpful
Thank you for your feedback
Feedback sent
We appreciate your effort and will try to fix the article