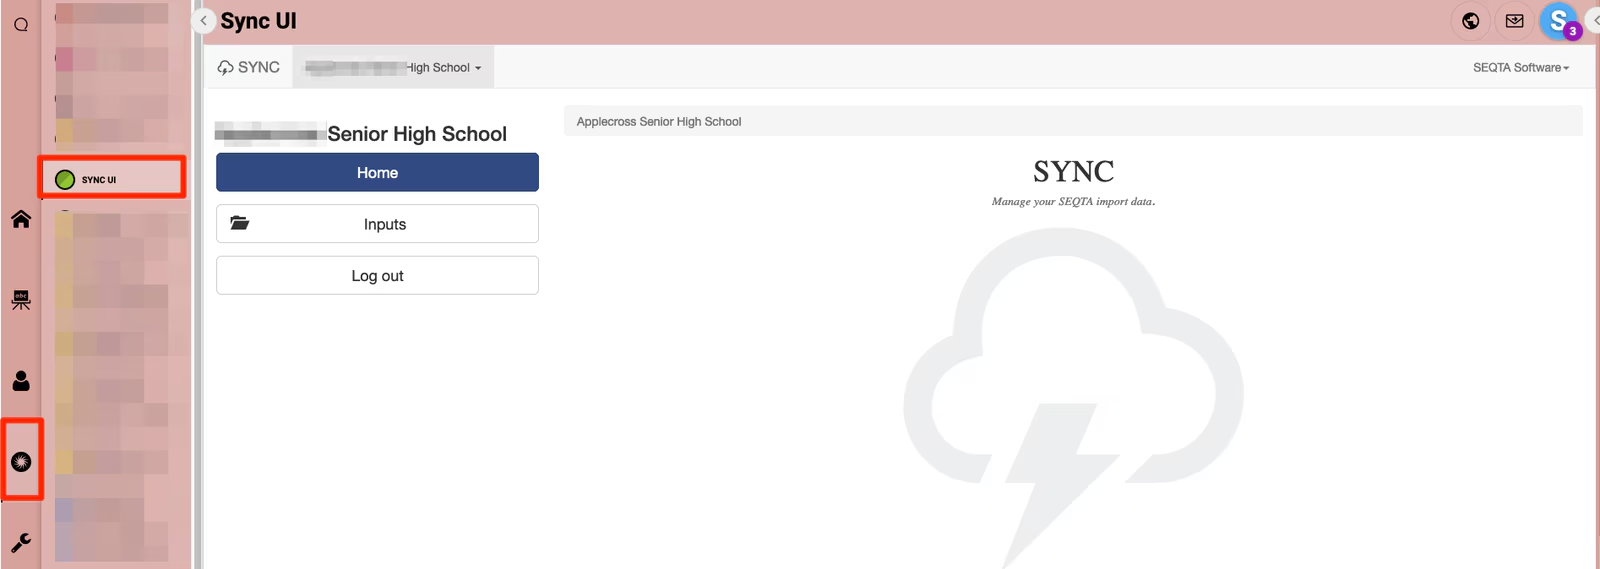
To import school data into SEQTA, it is reliant on a manual sync process called SyncUI.
SyncUI is an external web-based application that can be accessed as an external link or it has been embedded as a Portal Page "SyncUI".
Authenticating to SyncUI requires separate login credentials to your SEQTA Teach account. Our Support Tam will create your SyncUI login details with approval from an authorised staff member at your school, usually the School Education Contact or School Technical Contact.
Note: SyncUI login details are not linked to SEQTA Teach account. A SyncUI account's password is static
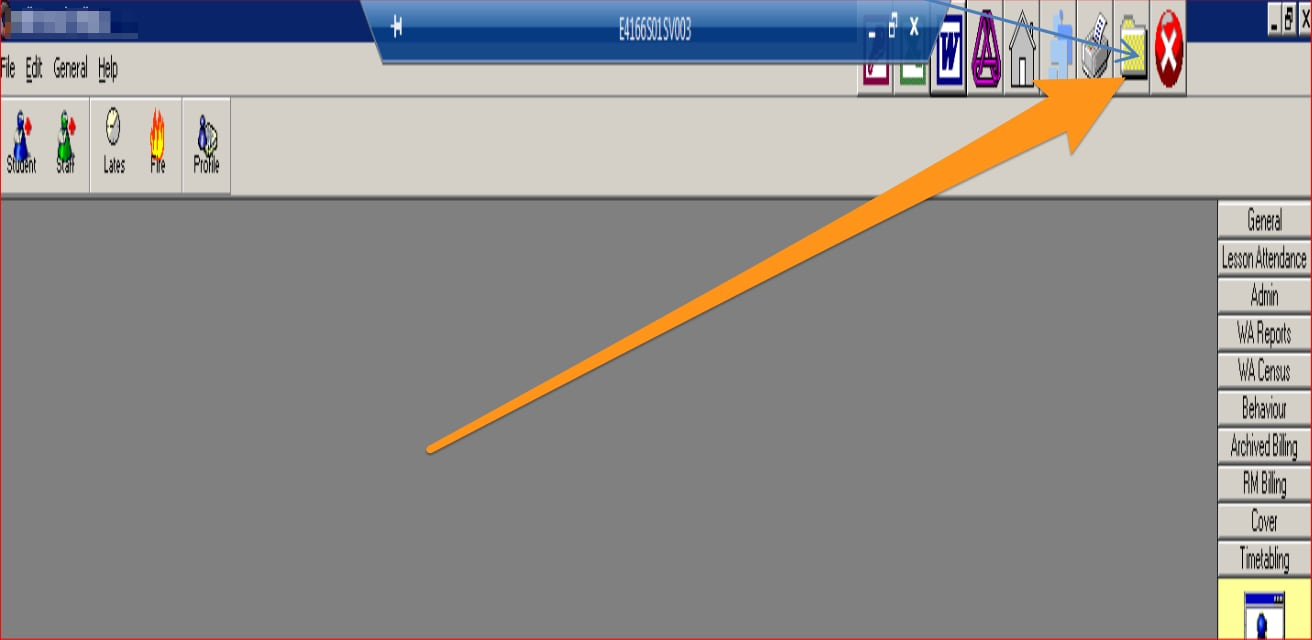
To export the SIS school data, such as Student info, Timetable, Staff, Rooms etc. data files rely on an SEQTA-SIS Export Utility tool loaded in the External Reports > SEQTA Reports folder. The data files are dropped into the SyncUI folder.
- If the school uses a Terminal Server, accessing the SEQTA-SIS Export Utility tool is located in the Terminal Server's K:Drive (RMMS)
- If there is no Terminal Server, the SEQTA-SIS Export Utility tool is loaded in the C:Drive.
For the Terminal Server Schools:
Microsoft Word - SYNCUi - SIS Help Guide v2.0.docx
- Log on to SIS Terminal Server system.
- In SIS click on the Folder icon top right hand corner
- Microsoft Word - SYNCUi - SIS Help Guide v2.0.docxMicrosoft Word - SYNCUi - SIS Help Guide v2.0.doc
4. Your computer will then automatically open one of your drives. (It may navigate to your H:Drive, in your File directory, navigate to RMMS Drive: K:/External Reports/SEQTA Export.)
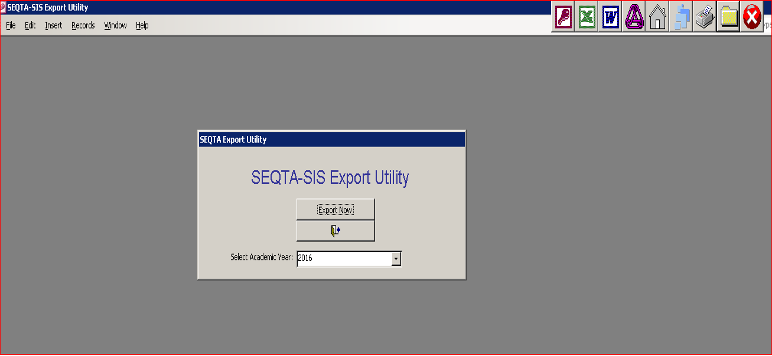
5. Click on the ####-##-## SEQTA-SIS Export Utility.mdb to launch the MS Access program.
6. Click on EXPORT NOW.
7. A message will pop up saying This process will take a minute or two.Do you want to continue? > Click on YES
8. Give it a moment to update. When complete you will get the following screen
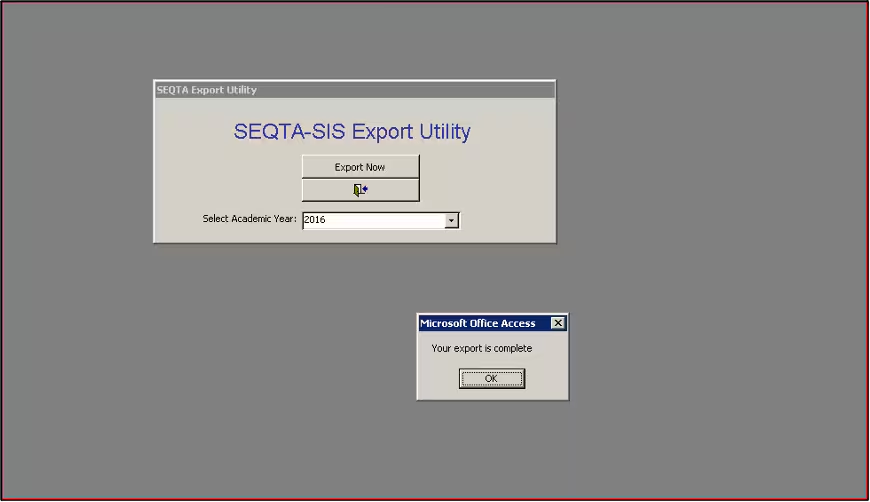
9. Click on OK and Exit out of Export Utility (the Door icon)
10. Completely Exit out of the SIS Terminal Server session
11. Open SEQTA and access SyncUI
12. Click on INPUTS > Click on one of Folders under CURRENT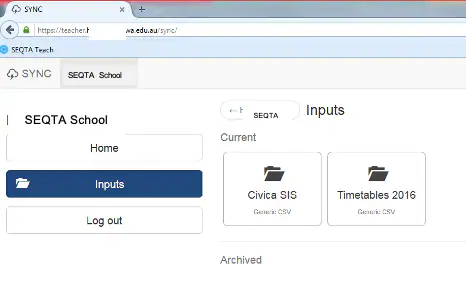
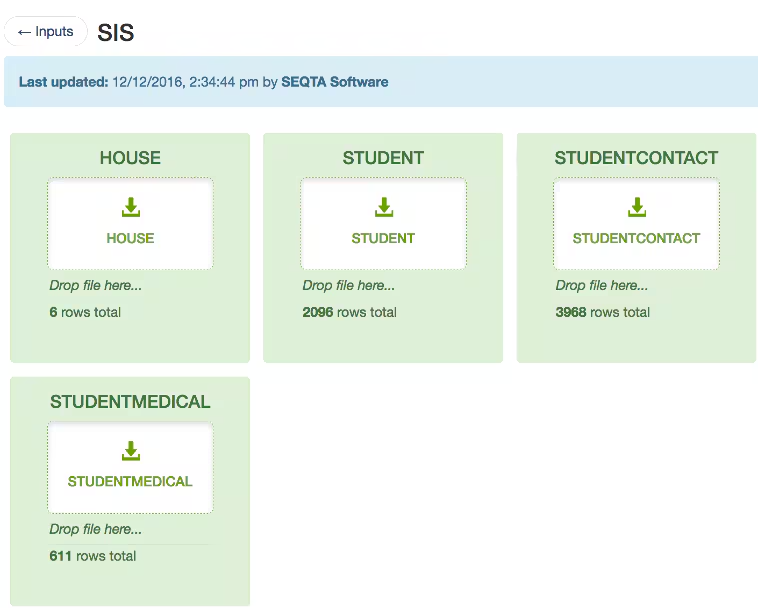
13. Click in the inside white area of any of one of the Green datafile containers
11. Your file directory will launch. > Navigate BACK to the computer file systems from the computer‘s desktop view.
12. Access to RMMS Drive: K:/External Reports/SEQTA Export
13. This time, open the Datafile folder. (List of text document datafiles may differ, that's fine)
14. Select ALL Datafile by using the Ctrl key + A - all datafiles should be highlighted.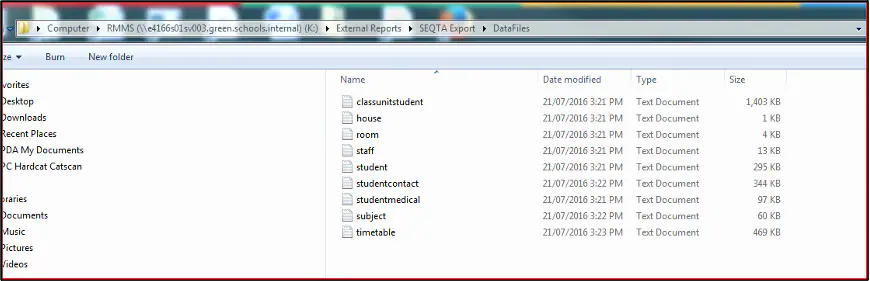
15. The below message will appear:
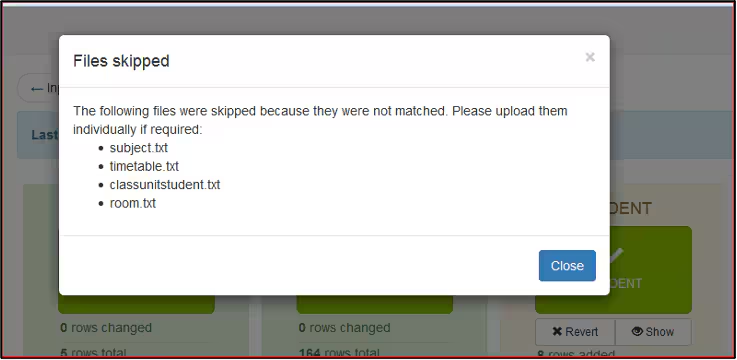
16. Take no notice, click on CLOSE and then scroll down the SyncUI page to click on the SUBMIT button.
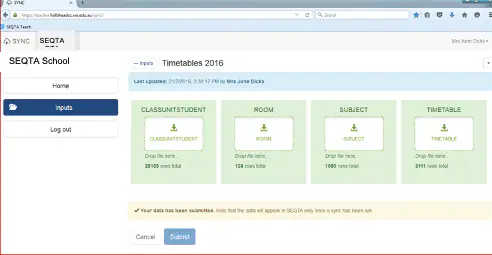
17. Repeat the process by clicking on the INPUTS folder on the left-hand side and then click on the Timetables folder - if you have one - later implementations have one folder.
Was this article helpful?
That’s Great!
Thank you for your feedback
Sorry! We couldn't be helpful
Thank you for your feedback
Feedback sent
We appreciate your effort and will try to fix the article