TABLE OF CONTENTS
Managing Attendance for Students Not Required to Attend
The 'Not Required to Attend' attendance type is used when creating an Attendance solution to indicate that a student, or group of students, will not be at the school and that this is not to contribute to their attendance statistics.
Entering an attendance solution 'Not Required to Attend' will be performed by an attendance administrator and has the following effects:
- Prevents teachers from marking attendance for the student via the Attendance roll page. (due to the attendance priority settings)
- Displays the 'Not Required to Attend' icon on the Attendance roll indicating to the teacher not to expect the student in the class.
- Depending on the priority, may overwrite any attendance already entered for the student for the specified date-range.
- Attendance entered with the type 'Not Required to Attend' is omitted from attendance reports and is not counted toward the student's total attendance.
Entering an Attendance Solution 'Not Required to Attend'
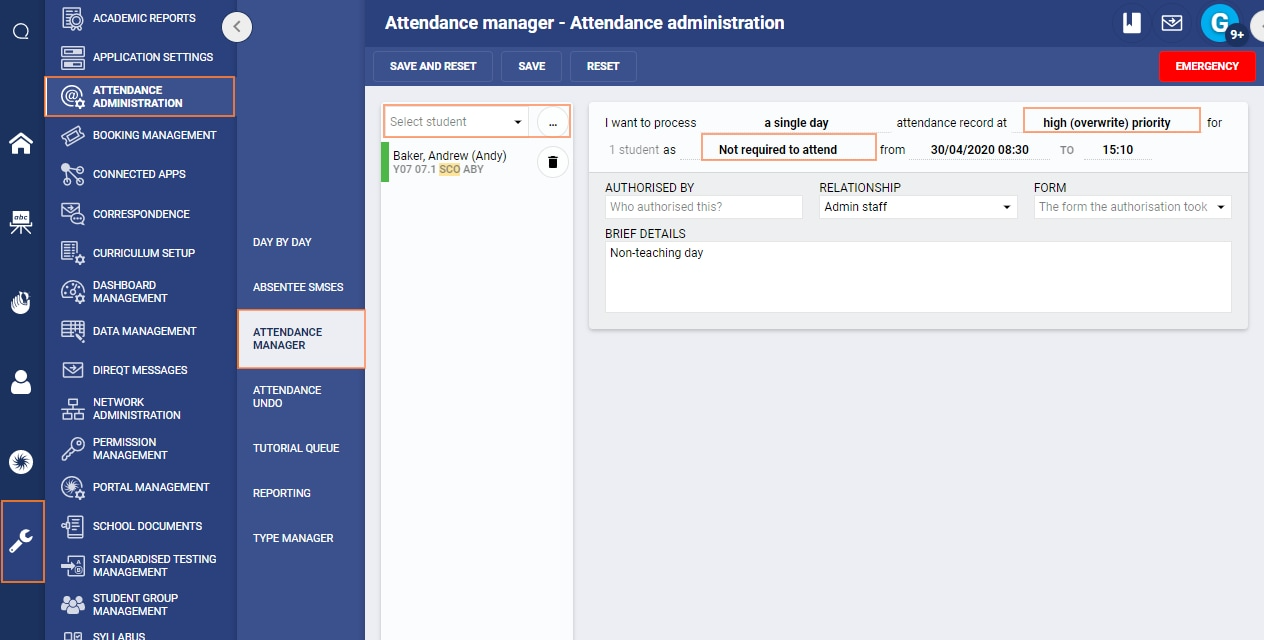
- Go to the Administration Workspace > Attendance Administration > Attendance Manager.
- Select the students and set the process options to A Single Day (for a specific day) or A Repeat Multi-Day (for a date-range).
- Set the priority to High (Overwrite) Priority.
- Select the 'Attendance type' called 'Not Required to Attend'.
- Set the date range, time range and applicable days.
- Fill out the details and other fields as required (eg: 'Authorised by', 'Brief details')
- Click Save.
- Large changes (date range, number of students) will require confirmation. If prompted to confirm the solution enter the number in the popup and click Save again. (The number should be number of students multiplied by number of periods)
Image below: Example
Checking Attendance After an Attendance Solution has been Entered
Once the attendance solution has been entered, refresh/reload the page then check the student attendance in the SIP. If there are a lot of students, wait 5-10 mins before checking the attendance as the processing time may be longer then typical.
The attendance should then display under the Attendance History in the SIP for the student. If there are no timetabled classes for the day, the 'Time-Based' button will need to be selected for the attendance to show.
Was this article helpful?
That’s Great!
Thank you for your feedback
Sorry! We couldn't be helpful
Thank you for your feedback
Feedback sent
We appreciate your effort and will try to fix the article